Showing posts with label diy. Show all posts

Sunday, December 4, 2011

Ribbon Wands

This week is a week of projects. The first on my list is getting the ribbon wands done. I started them last week and I really like the way they're turning out. I went to Wal Mart and Michael's Craft Store to get an assortment of yellow, white, and grey ribbon. They varied in width, texture, and shade.


We found long wooden dowels at Michael's Craft Store and Zac helped me cut them into 8" sticks. I cut the ribbon into strips that were slightly longer than the wooden dowels. Then came the gluing. To make sure that each wand was different I randomly chose ribbons of different colors and attached them to the dowels. Each wand had between 4 and 6 ribbons. I "sealed" the ribbons on the wand by gluing a small strip of white ribbon around the glued ribbons.


I've only completed about 10 of these little guys, so I have my work cut out for me. It's a simple project though, and now that all the ribbon and dowels have been cut the process should go much quicker.

In other project news, I've started working on our wedding invitations. This summer we found and ordered materials for pocketfold invitations. Since then I have been working on the invitation wording and I've finally come up with something that is fun and perfect for our invitations. This week I will be working on assembling the invitations and designing the inserts and RSVP cards. Once they are all put together and mailed out I'll post the details. (Gotta let our guests have a little surprise when the invitation arrives.)  

I also plan to finish working on the flip flops for our guests during the reception. I started that project during the summer and I only have a few more flip flops to tie together and label. I also need to create a framed sign to go along with the flip flops to let our guests know they are welcome to take a pair.

Once my projects are complete I'll be sure to post all about them.

Meanwhile, today is December 4th.....which means we have only 5 more months until the big day! Time flies!

Friday, December 2, 2011

Feather Hairpiece

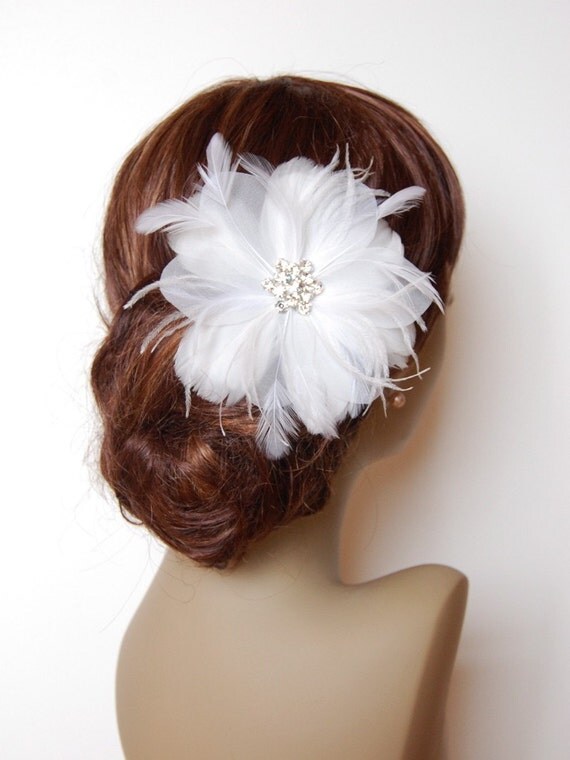
Earlier this week I decided it was time to get work on my feather headpiece. I pictured something with feathers and rhinestones; nothing too big or flashy. I was thinking of a smaller version of this feather headpiece I found here on etsy.com:


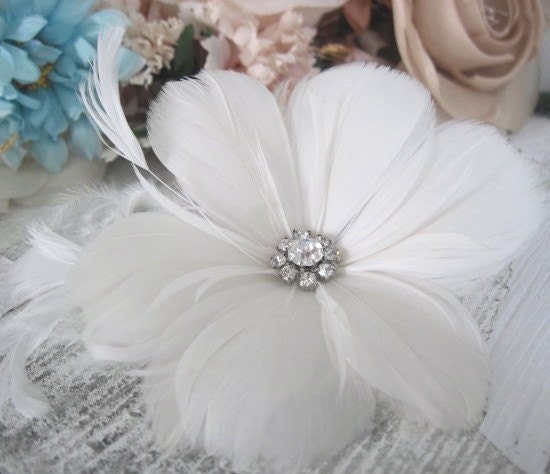
...or something like this headpiece found here :


So I gathered up my supplies and got to work.


I purchased a pack of white feathers from Wal-Mart for $1.48 (You can also find similar packs at Joann's Fabrics or Michael's Craft Store.)


I found these small crystals at Joann's Fabrics for just over $2.


This wire hair comb was also found at Joann's Fabrics for around $1.50.


The last thing I needed to work on this project was a little bit of white felt. I got one sheet of felt for just $0.25 at Wal-Mart.


The first step was to cut out a circle out of the felt. I used the bottle cap from a jug of juice to trace a circle on the felt.


Next I cut out the circle. This was used as the base of the hairpiece.


The bag of feathers I bought was green on the outside so I couldn't tell the size of the feathers until I opened the bag. The feathers ended up being longer than I needed, so I cut each one in half.


After the feathers were cut in half, I started glueing them to the circle of felt. I slightly overlapped each new feather over the last one I had glued down. Once a full circle had been made, I began cutting the feathers shorter and started another circle.


After all of the feathers were in place, I noticed that the hairpiece was a little too flat. To fix the problem, I used a needle and thread to sinch the felt circle together in the middle. This pinched together the piece and made it look a little more full.


The next step was the attach the wire hair comb. I used the needle and thread once more to sew the comb to the felt. After making sure the the comb was attached firmly, I glued a few more small feathers to the back of the hairpiece. This was just to make sure that the felt circle was covered and couldn't bee seen once the clip was put in place in my hair.


The last step was to attach the crystals to the center of the piece using a few drops of hot glue.


I LOVE the way the feather hairpiece came out. It was the perfect size; it made a statement without being too big. I was really happy with my finished project....

...unfortunately, I made a little crafty mistake. I got so eager to complete my project that I neglected to compare the color of the feathers to the color of my dress. The colors are a little off. It's not a huge difference, but it is noticeable. It's a little disappointing but it was such an inexpensive project that it's really no big deal. I'm going to check at Joann's to see if they carry feathers in a different shade. As for this feather hairpiece, it was a good practice project. Perhaps one of the girls in my Bridey group will like it and want to use it. If not perhaps one of my lovely readers will want to use it at their wedding. 

Saturday, October 15, 2011

So Much To Do

It's official...


...the save the dates are all addressed, stamped, and on their way to our guests! I can't believe that it is already time to be sending these out. Time has seriously flown by. We started out with 16 months to plan and organize, and now we're down to 6 1/2 months!

With that being said (and my last wedding nightmare still fresh in my mind) it's time to get down to business. The other night I sat down and organized a list of projects that still need to get done. I took a mental trip through our venue as if I were a guest and wrote down every project that came to mind:


The lists above (which don't include decorations like table centerpieces or items for the altar) may seem a little crazy! I promise I'm not a madwoman who thinks she needs to complete hundreds of projects. I wrote a list of items that I would need underneath each task to make my future shopping trips a little easier.

Though my project list is not three pages long, there are still quite a few things that need to get done and I plan on starting a few this weekend. With two days off a week and not having to worry about homework or exams, I should have plenty of time to get projects completed.

Here's the rundown:

Guestbook : We're planning on creating a photo guestbook. A nice bound journal or sketchpad + polaroid camera + photo corners = perfect.


- Ribbon Wands : Our venue doesn't allow guests to throw petals, or confetti after the 'I do' (it's on the lake and items could easily blow into the water polluting the area and causing harm to the wildlife). To make for fun photos the guests will have ribbon wands to wave after the ceremony.


- Tissue Packets : Packets of tissue for "Tears of Joy"


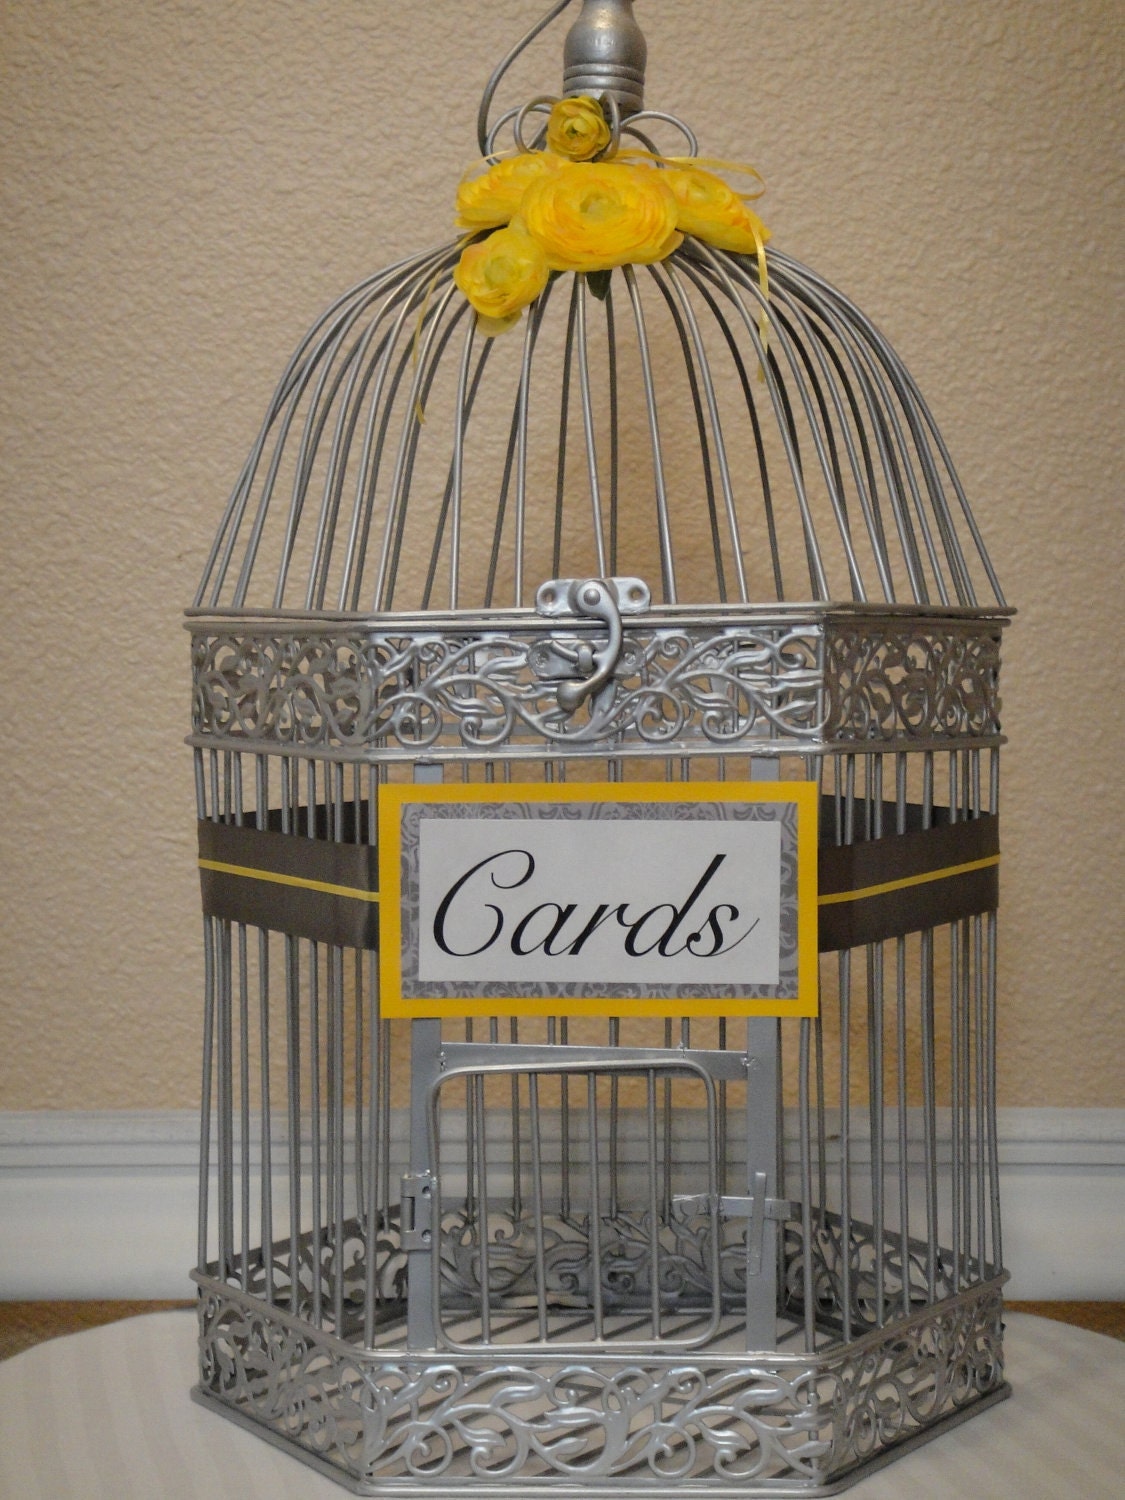
- Birdcage Card Box : I already have a little birdcage to put cards in. All that I need to do is create a cute banner or sign.


- Program Fans : Since our wedding is in May and it's possible that the temperature in the central valley will already be climbing, we thought that fans would be a better option for our programs than traditional booklets.


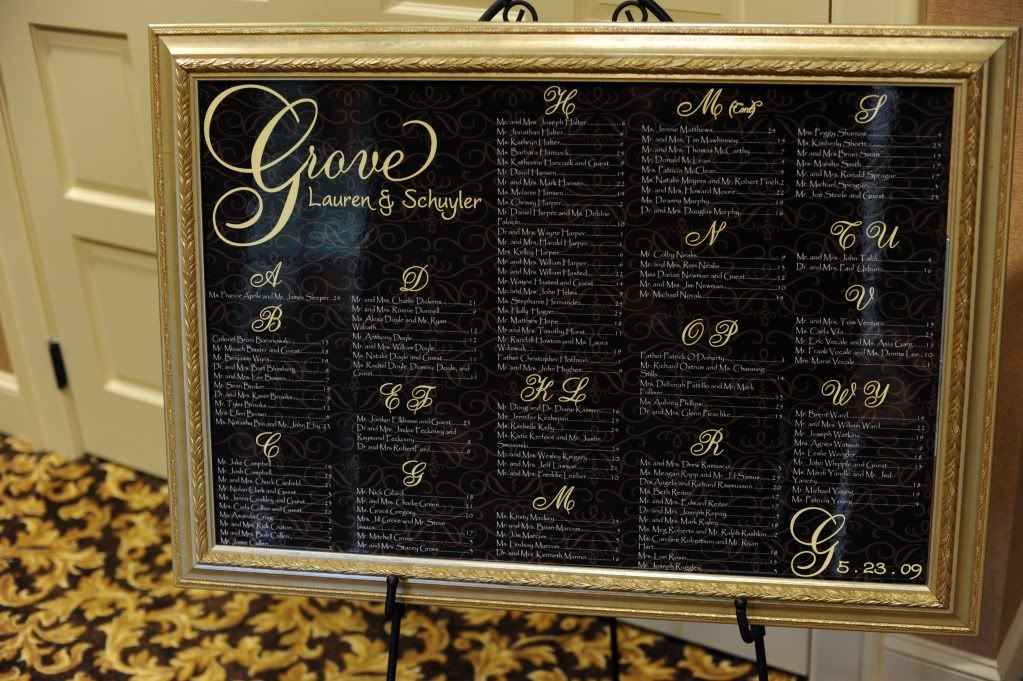
- Seating Chart Frame : Our seating chart will be posted on a big board rather than given to our guests via escort cards.


- Flip Flops : We will be offering our heel wearing guests a more comfortable option for the reception. I started this project this summer and I'm happy to say it's nearly complete.

{image...found on Pinterest with no source :( }

- Menu : Each table will have a menu with food options. I haven't decided if each place setting will have a menu or if there will be just one framed menu....it all depends on how much time I have.


- Drink Menu : I found a really cute chalkboard sign at Goodwill (I used it for Zac's 30th birthday...check it out here and here) and we plan to place it on the bar with the drink options.


- Bathroom Basket : A cute little bathroom basket will be in each of the bathrooms with items that guests might need throughout the evening.


- Games : Games will be set up on the lawn for guests to enjoy during cocktail hour. We'll need to get together a few more games and create a chalkboard sign to put on the lawn.


- Candy Buffet / Dessert Bar : Though we have tons of jars and glassware for each of these tables (shown here), we still need to get small favor bags and take home boxes for the goodies.


In addition to those projects, we still need to finalize ideas for centerpieces and start buying supplies to get everything in order.

So what do you think, did I bite off more than I can chew? Any other DIY brides out there have a lot of projects to complete? If you had a DIY wedding did you need to cut down on some of your projects before the wedding day arrived?

Wednesday, October 12, 2011

Why Didn't I Think Of This?!

I always love hearing/reading stories about how brides ask their best girls to be bridesmaids. It's such a special moment and some of the stories I have come across have been amazingly sweet. The stories are made even better when the ideas used to ask friends to be bridesmaids are super clever.

Recently I came across a SUPER clever idea by bride to be Bethany over at Rinse.Repeat. and I knew I had to share it.

Similar to my own situation, the majority of Bethany's soon to be bridesmaids lived out of town. Rather than call her girls or send them letters, Bethany created these amazing little bridesmaid boxes.

Aren't they beautiful?


She found the boxes at Joann's Fabrics, and painted them to match the color scheme of her upcoming wedding. The white bracket that made space for her message underneath the lid was done freehand by the bride to be. The message "be my maid?" was affixed to the box lid with stickers.


The inside of each box was filled with some incredible little goodies.


Bethany filled her girls in on all of the wedding happenings with adorable typed notes. These notes told the girls all about the wedding day plans, who the other bridesmaids were, what their roles in the wedding would be, and the dresses that they would be wearing on the big day.


In addition to the notes, Bethany included inspiration board style photos, paint chips, and fabric swatches to give her future bridesmaids an idea of the wedding vision she had created.


Such a smart idea! Not only are these bridesmaid boxes clever but they're also very informative to the future bridesmaids. What a neat way to ask the question "will you be my bridesmaid?" Kuddos to Bethany! If this is how she asked her girls to be bridesmaids, I can't imagine how amazing her wedding will be. I totally wish I would have thought of this!

Don't get me wrong. I love the way that I asked my girls to be bridesmaids. I had a great time making these wine bottles for Sarah, Amy, and Amanda (read all about the process here)....


...and this candygram package for Kim. (Click here to read details.)


More important than the fun I had creating these gifts, my girls really seemed to love them. Even if I could, I wouldn't go back and change the way I asked my girls to be bridesmaids.

I really think that Bethany's idea was pretty amazing (don't you?!) and I might have to figure out a way to modify it and create something just as nifty for my girls.

How did you ladies ask your girls to be bridesmaids? Did you write a note?...Create a gift basket?....Take them out to lunch?....Feel free to share your stories.

Tuesday, October 11, 2011

Pin-spired Project

I have found a bunch of really cool pictures and projects on Pinterest, and I decided that it was time to get started on recreating a few. On Friday, Kim (one of my bridesmaids), came into town and Zac made dinner for the three of us. I thought that it would be a perfect time to test out the recipe I found on Pinterest for a Reisling Strawberry Slushie. (Click here for recipe found at With Style and Grace.)


Doesn't that look yummy? The recipe called for riesling but I decided to use a pinot grigio instead. Not knowing how it would turn out, I won't lie, I picked up a 2 Buck Chuck bottle of wine. (Though cheap it was still tasty.)


In addition to the wine the rest of the recipe called for strawberries, sugar, lime juice. You will also need two ice cube trays.

The first thing to do while prepping the drink is to reserve one cup of the wine and put it away in the fridge.


Next, wash and hull fresh strawberries....


...you will need 2 cups for this recipe.


You will also need 2 tablespoons of sugar (I used Splenda.)...


...and 1 tablespoon of lime juice.


Pour the remainder of wine in a blender or food processor (remember to reserve 1 cup and put away), then add the strawberries, sugar, and lime juice.


Blend mix until chunks of strawberries are gone.


Pour the mixture into 2 ice cube trays and place in the freezer until frozen solid.


After a few hours you will have some very pretty pink ice cubes. Now it's time for the remaining 1 cup of wine. Blend the ice cubes with the last of the wine. The mixture should have the texture of a smoothie.


Pour and serve! The mixture made enough to fill three wine glasses.


It was a yummy and refreshing treat. Thank you Pinterest!

Anyone tried out a recipe or worked on a project that was inpired by Pinterest? Have you found a project on Pinterest that you're excited to complete yourself? I'd love to hear all about it.

Tuesday, October 4, 2011

Candy Gram!

Reading the wedding forums on sites like weddingbee.com and theknot.com, I've noticed that there have been a lot of brides who regret their bridesmaid choices. I cringed reading stories of uninvolved bridesmaids, fights about clothing, and friendships ending.

I'm so thankful to have such amazing girls in my life! I knew that I wouldn't be one of those brides who would look back at photos from the wedding in 20 years and have regret or feel sad that the girls who stood by my side were no longer around. (Whether they like it or not my girls are stuck with me for life!)

I didn't realize however, that I would regret NOT having someone there.

I've been having some regret about not asking my girl Kim to be a part of the bridal party. I absolutely love Kim. We always have a fantastic time together and I know that I can count on her when I need an ear, a shoulder...or a glass of champagne. Talking the situation over with Samantha, and after running into Kim at Deja Blues, I knew that if I didn't ask Kim to join the bridal party that I would really regret it.

*Like I said....This is how I always great Miss Kimmie!*


Instead of just calling or sending her a text, I wanted to find a fun way to ask Kim to be a bridesmaid. It means a lot to me to have her by my side and a question like this was in the need for something special. (When I asked the other girls to be in the wedding I gave them all wine bottles.)

Kim moved for work and her job keeps her on the move so I wasn't sure when I was going to see her next. Since I was planning on mailing her a little gift,I decided that I would need a cute way of asking her that perhaps included a little poem or note. I revisited the ideas I had back in January and decided that the candy gram idea was the cutest way to ask Kim to be a bridesmaid.

I thought the candy gram idea was super clever. It involved incorporating candy names into a little note about bridesmaids. So I gathered together all the candy needed and began putting together Kim's package.


The candy used included: Dots, Mounds, Snickers, Smarties, Dove Promises Chocolates, LifeSavers, and Now and Laters. I also added some Good and Plenty.


After arranging the candy to fit into the box I printed out the note to include with the package. After all, Kim needed to know why I was sending her a box of candy. I printed out the note on cardstock and attached it to some pretty scrapbook paper.


The note reads as follows :

Bridesmaids are more than Dots in your life. They are Mounds of fun and make you Snicker. They are Smarties that share advice and keep their Promises. Above all, they are your Life Savers and will stand by you Now and Later.
 Would you be my bridesmaid?!
 I guarantee the fun times will be Good and Plenty!
I love you Miss Kimmie! I really should have asked you at the beginning and I have been kicking myself for not asking you sooner! I love you so much and I would be honored if you would stand by me on the big day!
Love you girl!
-Teeny
**I hope this candy sweetens the deal!**
I found a cute little round box at Michael's Craft Store that I used to hold the candy, and tied it up with some white ribbon. The package went out through overnight shipping. I went to sleep with a little excitement knowing that Kim would be getting the package the next afternoon.


I decided to text Kim the next afternoon to make sure that she was going to be home. Kim teaches a mobile classroom and she travels from city to city to teach. Thankfully she was going to be home that day to pack up a few things before heading to the coast. Had I waited a few more days Kim's package might have melted on her porch.

A few hours later I got a phone call from a very excited Kim! She said that she would love to be a bridesmaid and I am so happy that she'll join the other ladies by my side on the big day!

All of my ladies:


I love you girls!