Saturday, July 30, 2011

Our Project Wonderland Progress.

Well, it's been four weeks since I wrote about Project Wonderland (our plan to fix up the backyard and turn it into a wonderful space to both relax and entertain) and I am happy to say that Zac and I have made some progress. The backyard project is not always numero uno on our list of things to do (as we both have work and other things to tend to) but a few items have been crossed off of our to-do list.

Let's revisit that list shall we.....here's our progress:

- Clean off patio space and find proper places for everything.
- Set up sitting area on patio space.
- Add flowers and plants to the back wall. (Partially complete)
- Build latice wall on the back fence.
- Grow vines on the back fence latice wall.
- Hang votive lights from tree .
- Create overhead lighting for the patio space.
- Place solar power spot lights in front of trees.
- Finish digging out trench to add fish pond.
- Lay cement foundation for brick wall against back fence.
- Lay down cement blocks to begin building wall against fence.
- Cover cement blocks with stone.
- Lay cement foundation for additional patio entertaining space.
- Add electrical power from the house to additional patio entertaining space.
- Lay down paver path from patio space to additional patio entertaining space.
- Put in lines for water pump for fish pond and propane for outdoor fireplace.
- Build outdoor fireplace.
- Lay down pavers on floor of additional patio entertaining space.
- Build furniture for additional patio entertaining space.
- Add stone to outside of outdoor fireplace.

For not being able to make the backyard our main priority right now when it comes to projects, Zac and I are pretty happy with the progress we've made. I should actually say that I'm pretty happy with the progress that Zac has made. He's responsible for all of the hard work that has gone into completing our backyard projects. I come up with a few ideas (like the hanging votives lights project seen here) and Zac is handy enough (and awesome enough) to figure out a way to make it happen. I appreciate this ability of his more than I can express in words!

Anyway, back to the checklist. After we completed the votive light project, Zac and I got pretty excited to continue on with our list of backyard improvements. We concluded that the next easiest and least expensive item on our list was to clean off the patio space and find a proper place for everything that was currently cluttering the large space.

So we set to work and decluttered the patio space before Zac sprayed it clean with the hose.


Jim's fear of the yellow garden hose kept him in the house watching the action behind the safety of the sliding door.


After Zac sprayed away the dirt and spider webs that had accumulated on our patio, it was time to set up the sitting area so that we could finally sit on the patio and enjoy our backyard. My parents recently gave us their old glass patio table and two matching chairs, which we set up on our new clean patio. After a little rearranging we finally had a place to sit and relax.


In addition to the new lounge area, you might have noticed another patio upgrade in the picture above. In case you aren't all too familiar with our patio, I'll point out the change for you. Thanks to my handy-dandy Zac, we now have overhead lighting on our patio!

The lighting project was one thing on our to-do list that we were really excited about. Our back patio only has one small light that barely shines bright enough to see a one foot radius from the back door. Since we like to entertain and wanted to hang out on the patio after the sun went down, it was important to add some more light to the space. So Zac pulled out his power tools and went to work on adding some more lights above the patio.

Zac went to Lowe's and purchased four of these interior light fixtures for only $5 each. We realize that they are indoor light fixtures, but since they're going under the patio awning we don't have to worry about them being hit with rain, too much sun, or any other outdoor elements that would require a more heavy duty outdoor light fixture.


The plan was to connect all of the new light fixtures together so that they could all be powered through one electrical source. To make sure that we didn't have wires dangling everywhere, Zac decided to drill holes through the beams of the awning in a continuous line so that the wires could run a straight course to each light.


When he was finished it looked like this:


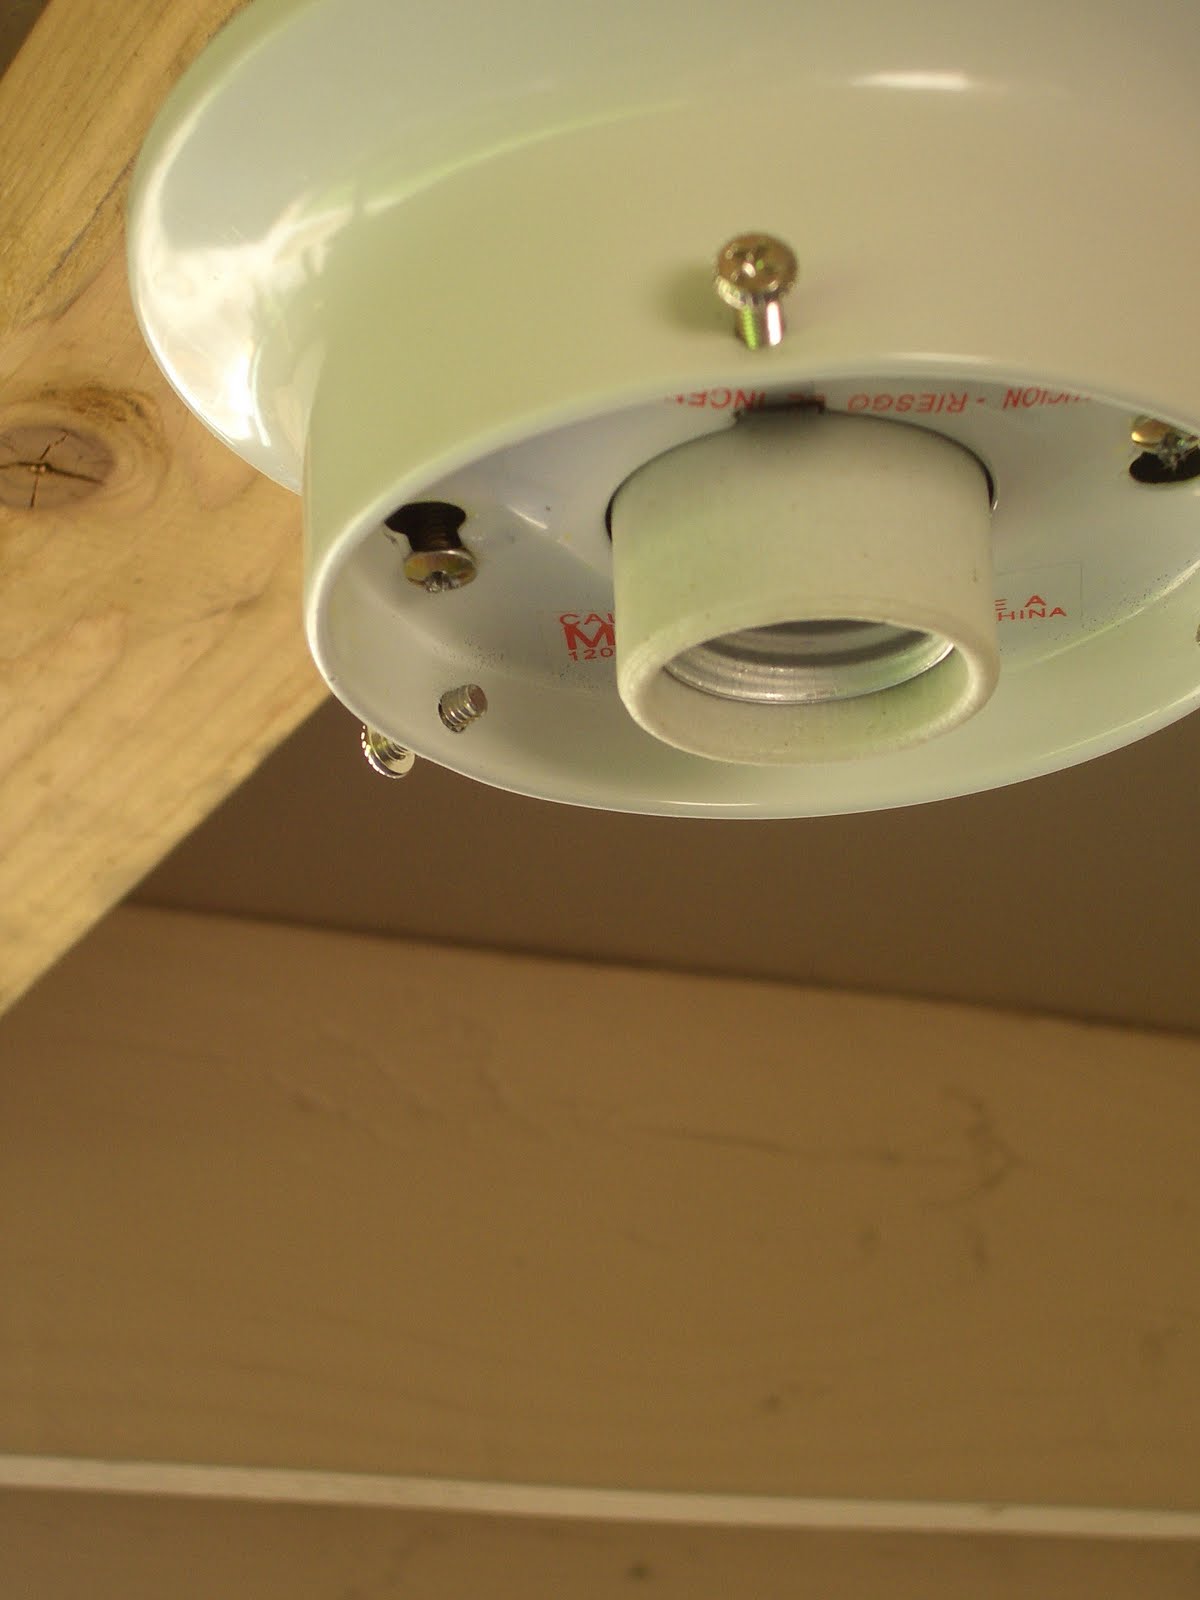
Next, Zac took down the only patio light that came with the house. Check out how small it was:


We decided that rather than replacing the light, we would just use it's electrical power to light the overhead lighting we were about to put in, and then cover up the spot where the light used to be. In the future we hope to get french doors to replace our sliders. If we kept the light (or added a new light in the same place) our future french doors would probably hit up against it when open. Plus, we figured that four overhead fixtures would provide us with plenty of light on their own. So Zac pulled down the light and used the power to connect all of the overhead lights and allow us to use the existing light switch inside the house to power our new fixtures. (See, I told you he was handy.)


Since there are 5 posts that support our awning from crashing down on us, it was an easy decision to put the lights evenly spaced between each post. Zac cut wooden blocks which he then connected to the awning. These wooden blocks would act as the base for the new light fixtures.


Next, he took the wire that he had connected to the old light fixture outlet (seen two pictures above) and began threading it through each of the holes he had drilled earlier, using a staple gun to keep the wire in place as he worked.


After the wire was in place, it was time to attach the new light fixtures to their wooden bases....


....and connect the wires.


We were pretty excited when the lights went up and we could successfully use the inside light switch to turn them on and off. You might also notice in the photo below that the wires seem to blend right in with the awning. This is because the previous owners were kind enough to leave behind a can of paint they used when they built the awning. Thanks to Lowe's we were able to color match the paint and Zac painted the wood blocks and the wires which really made the look come together nicely. The lights look as though they've been here all along.


As a little surprise to me, Zac traded out our old light switch and replaced it with a dimmer switch. I was thrilled with this change. It was such a great idea. Now we can control the amount of light on the patio and create different moods. (The night that Zac showed me the final product he lit candles on our glass patio table, added some flame to the votive lights in the tree, poured some champagne, and set the new overhead lights to a soft glow. It had the perfect romantic vibe.)


As for the hole in the wall that used to be our patio lighting, Zac was able to patch it up using a replacement panel that he purchased at Lowe's. The texture is slightly differently than the existing panels but the difference if hardly noticeable. Zac used the the paint to color match the new panel after he put it in place. There is a tiny seam that can be seen when you look up close. Zac did such a great job of patching the spot if you didn't know that the panel had been replaced you wouldn't even notice.


The light project, which only took one day to complete, made such a change to our backyard's evening look. Looking at the list of things to get done, we saw that we could get even more light in the backyard by crossing  "Place solar power spot lights in front of trees" off of our list. We picked up two solar lights for $14 each at Lowe's and put them in front of each of the cypress trees against the back fence.


The solar lights get plenty of sun during the day so they put out a nice spotlight on the trees in the evening. We'll definitely be adding a few more spotlights on the other trees in our backyard a little later in the future.

Next came laying down the cement so that we had a foundation for the stone wall that will go along the back fence. To start the project, Zac dug out a trench along the back fence where he wanted to lay the cement. He piled the dirt up against the area between the trench and the fence to add some heighth to the future flower bed.

Zac purchased a bunch of wood from Lowe's (some of which he used for the light project) and planned to use it to line the trench and prevent the cement from seeping into the grass area.


The wood was also really important for maintaining a straight line and making sure that the new foundation didn't turn out crooked and crazy. It also helped Zac determine how high the concrete would go once he poured it and allowed him to have a reference once it came time to level the concrete.


Next, Zac used some posts to shape the rest of the trench including the rounded areas.


The concrete was poured in stages in the early morning and evening when the weather was cool outside. In the right corner of the yard, Zac had Jim imprint his little paw prints. He wrote in Jim's name and the date as a permanent reminder of when we got our little pup.


After a few days, the concrete had time to settle and it was time to remove the wood.


Zac filled in the hole along the trench left from wood that was removed (the grass will eventually grow back in this area) and began lining cement blocks along the new concrete foundation. Later these blocks will be covered with stone that will match the future fireplace.


We started adding flowers to the new bed behind the concrete wall. We aren't crossing this item off of our list just yet because we plan on putting in a lot more plants and flowers.


The lillies have really taken off and are quickly becoming some of our favorites.


So there you have it, a little update of our Project Wonderland progress. We're excited to get everything done and Zac is amped to add a few more projects to the list (including moveable planters). We'll share more details as we complete more projects and cross them off of our list.


Anyone else have some summer projects going on? Feel free to share!

Thursday, July 28, 2011

Cards and Pockets

Planning a wedding involves a lot of decision making. From where and when the big day will take place to what we'll be wearing and all the tiny details in between, Zac and I have had (and still have) a lot of things to sort out.  When it came to invitations we knew that we would be making them ourselves. We looked at various websites to order invitations and have them printed and (although we aren't in any way amazing graphic designers) we definitely thought that we could make nice invitations for a fraction of the cost.

I started looking around online at pictures to get some ideas about how we would like our invitations to look. In the end we decided that since we needed room to give our guests all the appropriate information regarding our event, it was necessary to create invitations with plenty of space. Pocket invitations (like the one pictured below) were the way to go.


After seeing that a company called Cards and Pockets had some great reviews, I jumped on over to their website to check out their products for myself. As you might have guessed, Cards and Pockets have a variety of pocket style invitations to choose from. All of the cards come blank and are available in a array of colors to help build your own unique invitation, specific to your event.

We really liked the look of the invitations and decided that we would check out a few samples of the Signature 5X7 Pocketfold (mainly because we couldn't settle on a color without seeing them in person). As you can see from the diagram below, when folded the invitation would be small enough to put in the mail without having any special shipping, and when pulled open, has plenty of room to showcase all of the wedding details.


Within a few short business days of placing our order for the samples we received a small cardboard envelope in the mail:


We ordered two samples: one in yellow and the other in dark gray.


Both invitations were very nice and went well with our color scheme. We didn't intend on sending out two different invitations so we needed to make a decision. After thinking about how the invitations would look as an end product we realized that we had more options with the dark gray invitation.


In addition to pocketfold invitations, Cards and Pockets also sells an assortment of accessory items like envelopes, liners, and mattes to make the invitations more fun and professional looking. We knew that we would need to get envelopes and thought that it would be a nice touch to get a printed liner to make the invitation a little more special. The envelope liners (for both the invitations and the RSVP cards) are available in 15 different patterns and over 50 colors. We settled on the pattern below (called Retro) in a shade of yellow to add a pop of color to our dark grey invitations.


Not too long ago we recieved our order in the mail. (I just love coming home and seeing packages on our front step!)


We ordered enough pocketfold invitations to send out to our guests, as well as a few extras in case we make some mistakes. (Having never put together invitations like this before I'm sure we're bound to have a few mishaps.) We also ordered envelopes for both the invitations and the RSVP cards as well as liners for both envelope sizes.


We love the way the liners look. The yellow is bright without being neon and the pattern is fun (which is definitley the vibe that we're going for).


You might also notice a yellow rectangular shaped package in the bottom left corner two photos up. We decided to order some precut colored mattes to add a bit of contrast to the dark grey invitations. This yellow matte will be glued to the center of the pocketfold and a white invitation will be placed on top of the matte. If you're like me and you need a visual, just check out the photo below.


We haven't started constructing our invitations just yet, but we're pretty happy with the materials we have so far. The next steps will be deciding on invitation wording, choosing a font, and creating a design to make the white invitation more interesting.

Wish us luck.

Tuesday, July 26, 2011

From Bride to Bridesmaid

This week has gone by so fast and I realize that I have become a bit of a blogging slacker. I have been a busy girl this week and unfortunately I haven't been able to keep the blog updated with all the happenings lately. In addition to entering my third week of training for my new position at work, Zac has been working hard to cross items off of our Project Wonderland list, Jim is learning some new tricks (our little man can now high five/paw), and we have made a little change to the inside of our house as well. I'm looking forward to posting an update on our backyard project as well as our little indoor redo. Zac and I are pretty happy with the way that everything is turning out and we're eager to share.

In the meantime I have other exciting news to share...

You might remember my friends and coworkers Matt and Samantha from this post.


Matt and Samantha got engaged back in April and Samantha and I have been bouncing wedding planning ideas off of each other ever since. It's so great having another budget bride to talk to and figure things out with.

It doesn't hurt that Sam is a real sweetheart. (No I'm not talking about Jersey Shore's 'Sammi Sweetheart'. Sam is truly sweet minus all the reality tv, sassy, drama, fighting nonesense.) I really like hanging out with Sam and we have a great time together.


Recently, I was completely delighted when Sam asked me to be in her wedding!!! The invitation was such an honor and I happily said yes. Hearing that Samantha only intended to have two bridesmaids (her maid of honor Michelle and me) made the invitation even more special. I'm excited to be one of the two ladies standing by Samantha's side next summer as she says 'I do' and gets married to Matt.  


On Sunday, I met up with the bride to be and her MOH Michelle at David's Bridal to pick out our bridesmaid dresses. Sam had done her research, looked through the David's Bridal website and already had an idea of what dress would be the perfect one for us to wear. We picked out a few other dresses to try on just for the sake of comparison, but in the end Samantha's internet choice turned out to the be perfect dress in person. Here we are with the final choice:


Aren't the dresses cute and fun?! Samantha's wedding dress also has pick ups in the skirt so our bridesmaids dresses will coordinate well with her gown. The colors above are not what Michelle and I will be wearing come next summer. Samantha's wedding will be a beautiful mix of blue, black, and white with a mix of polka dots. Our dresses will be in a David's Bridal 's shade of blue called 'Malibu'.

After we picked out the perfect bridesmaid dresses to wear at Sam's wedding, Samantha presented Michelle and I with a little gift from Victoria's Secret as a 'thank you' for being a bridesmaid. (See what I mean about being a sweetheart.) Just check out the cute "Sexy Little Bride" tank that Samantha picked up for me! So adorable! I can't wait to wear it as my wedding day gets closer (just another nine months to go). Thank you so much Sam!


I look forward to getting together with Samantha and Michelle a bunch over this next year as we celebrate and help plan to make a perfect wedding day for Samantha and Matt. I'm excited to be a part of their big day. Congratulations again you two!

Monday, July 18, 2011

Growing Up

Our little Jim is getting big. Well as big as a pint size chihuahua can get. Here is a picture of Jim just two days after we picked him up from Chowchilla :


And here is a picture of our growing boy just a few days ago:

As you can see he is no longer a little baby. Kelsey and her family should be happy to know that the little abandoned pup they took in and gave to us is thriving and loving life in his new home. We were happy to hear from the vet that, even with the time he spent on his own before he was found and taken in, Jim is in great health and his growth is right on schedule.

The vet estimated that Jim is now just shy of four months old. In people years this would put Jim right between two and three years old. For being in the 'terrible twos' Jim has been a pretty good boy. There have been times when he doesn't listen, he chewed up the corner of his toybox basket (which doesn't matter to us because it's his basket), and he has dug some mini sized holes at the edge of the lawn, but for the most part Jim has been a well behaved little pup.


Our biggest concern has been house training. We don't have a built in doggy door and we don't wish to punch a hole in our wall to put one in, so we're looking at alternate solutions. We have a few options that we are considering at the moment. In the meantime, we've been working out a routine with Jim that will create some consistancy and eliminate indoor accidents.

Thankfully, after Jim was found and taken in, he spent about two weeks in a home that housed four other dogs. We learned early on that perhaps due to this time in a dog friendly home in addition to his time spent in the great outdoors of Chowchilla, Jim not only knew to go to the bathroom outside but he preferred it. After we first brought Jim home and he was still very small we were hesistant to let him run free in our backyard until we could ensure that he would be safe. We thought that it would be smart to train Jim to do his business on potty pads for those days that we would both be gone at work, but we soon realized that it wasn't going to work. Jim did not like sitting his little booty on our tile floor and found the potty pads to be a nice, warm place to sit down. Obviously, he wasn't going to make a mess of what he had turned into his play mat.


Within the first week we came to the conclusion that the pads were not going to work. We began to notice within a few days that each time Jim went to the bathroom in our home not only did he go to a different room but he also always chose a place that was right by a door. We decided that instead of training Jim to go on a pad (we really didn't want to have to smell his messes or clean them up in our home anyways) we would train ourselves to pay closer attention to Jim and to let him out when he needed it. After a few days, we were able to pick up on the cues that Jim gave and the indoor accidents were a thing of the past. Since the weather has been far less hot than in previous years, we have been able to keep the backdoor open and Jim is free to walk outside and take care of business whenever he needs to. We will have to figure out a doggy door solution before the weather changes and keeping the door open all the time while we're home isn't an option. For now our current arrangement is working out pretty well.

After getting the house training issue under control, Zac and I got rid of the potty pads and realized that our little man didn't have a warm place to rest his tush. Our upstairs has wall to wall carpeting, but until we could make sure that he wouldn't mistake our carpet for grass Jim was only permited to be downstairs on the easy to clean tile.(We even put up a baby gate to keep our pup safe and downstairs.) In addition to getting Jim a new bed, we also got a small rug (a bathroom mat that we picked up at HomeGoods for $4.95) and set up an area especially for Jim.


Jim really seems to love his new little bed. Whenever he feels sleepy or bored he walks right over to his bed and puts himself to sleep. Here he is snuggling up to mini tennis ball.


Over the last two months that we have had Jim, his personality has really developed. Gone are the days that Jim didn't make a peep. He's not a yapper by any means but he will speak up if he has a problem. Just last week he came running into the house, stood behind the sliding glass door, and began barking out toward the back lawn. Curious, I got up to see what he was barking at. Jim followed me outside still barking but only walking as far as I would walk. It didn't take me long to see that a cat had wandered into our yard and that Jim was not happy about it. I got a good chuckle as I realized that Jim had run inside to scare away the cat. So much for a guard dog right? I don't blame him though. That cat could have messed him up pretty bad. Other than cats, Jim is also afraid of the box fan we keep downstairs when the temperature starts to rise, the vertical blinds in front of the sliding glass door, and the yellow water hose in the backyard.

Scared-y dog as he might be, Jim is just as sweet and lovable as ever. Since day one Jim has been a snuggly little guy. He prefers to sleep in someone's lap than in his own bed.....


 ...and he gets very excited when new people come over. He's a charming little pup who is generous with loving kisses.


His fun little wardrobe is definitely adding to his personality. I'll admit that I'm guilty of treating Jim like a doll instead of a dog and I'm so glad that Jim is fine with us me dressing him up. We dressed him in his first shirt (a blue and white striped polo shirt) on his third day in our home and now Jim is pretty familiar with the process. He holds his head still as we slip the shirts on and he even slips his little paws into the arm holes. Most people might think that putting clothes on a dog is pretty ridiculous, but I have to say that he looks pretty darn cute in his little outfits. Just look how adorable he is in his basketball jersey:


Here are just a few of his little outfits:


As you might have guessed Jim is just a little spoiled. I can honestly say that I am not the only one to blame when it comes to spoiling this little guy. Jim has received a few gifts including a gray hooded sweatshirt from Amy and some horse hoofs for chewing from Kim. The majority of gifts however have come from my parents. My parents have adopted Jim as their new little grandson and have been showering him with gifts and love. Thanks to them Jim now has a new leash, harness, bandanna, two shirts, and his new all time favorite toy....a stuffed duck that quacks. Once they handed that duck over to Jim there was no getting it back.


He even fell asleep with his new little friend.


Jim's other favorite toy is the first toy we ever bought him; a red rubber bone that squeaks. I'm sure the neighbors just love us for getting him this toy as it's squeaking can be heard sometimes for minutes on end. Jim seems to love it though and we'd rather have him chew up that bone than some of our favorite shoes (which thankfully have not been on his radar!).


Jim's size has been one of his most obvious changes....up until now. When we first got Jim one of the things that we loved about him were his little floppy ears. Just about a week ago we noticed that his right ear was starting to pop up.


Now it's official, his ears have both perked up and he definitely looks like a chihuahua!


I do miss his floppy ears but the new pointed look is just as lovable. I'm a sucker for that little face!

So there you have it, a little update on our little pup. (AKA:  A 1,488 word post gushing about our Jim.) This little guy has definitely become a part of our family and we just love having him here in our home. It's so wonderful coming home and being greeted by this little creature who is just so happy to see us. We're pretty happy to see you too Mr. Jim!