Monday, December 5, 2011

We Have Chair Covers


This morning, Zac and I had a meeting at Maty's Chair Covers to discuss color choices and fabric options for our reception chair covers. It seems to funny to have a meeting about such things but different colors really do change the look of the space so we had a meeting. We decided to have white covers so that we can add a little color with the sashes and not overwhelm the space. Our choices for sashes were between satin and organza fabrics. Though we liked the look of a satin sash better than the organza ones, they only had yellow sashes available in organza, so that's what we chose. Our table linens and chair covers are white so the yellow will add a nice springtime color for our May wedding. So our chairs will be a yellow version of the ones pictured below.


We thought the overlay on the table pictured above is really pretty and goes with our color scheme, but opted not to do overlays. There was also the decision of draping. Maty's has done several weddings at our venue and they carry the materials to add drapery over the head table (seen in the picture below). It looks nice but we don't think it's necessary. The venue is pretty enough without it.


We are thinking of doing some drapery on the aisle... more on that later.


Sunday, December 4, 2011

Ribbon Wands

This week is a week of projects. The first on my list is getting the ribbon wands done. I started them last week and I really like the way they're turning out. I went to Wal Mart and Michael's Craft Store to get an assortment of yellow, white, and grey ribbon. They varied in width, texture, and shade.


We found long wooden dowels at Michael's Craft Store and Zac helped me cut them into 8" sticks. I cut the ribbon into strips that were slightly longer than the wooden dowels. Then came the gluing. To make sure that each wand was different I randomly chose ribbons of different colors and attached them to the dowels. Each wand had between 4 and 6 ribbons. I "sealed" the ribbons on the wand by gluing a small strip of white ribbon around the glued ribbons.


I've only completed about 10 of these little guys, so I have my work cut out for me. It's a simple project though, and now that all the ribbon and dowels have been cut the process should go much quicker.

In other project news, I've started working on our wedding invitations. This summer we found and ordered materials for pocketfold invitations. Since then I have been working on the invitation wording and I've finally come up with something that is fun and perfect for our invitations. This week I will be working on assembling the invitations and designing the inserts and RSVP cards. Once they are all put together and mailed out I'll post the details. (Gotta let our guests have a little surprise when the invitation arrives.)  

I also plan to finish working on the flip flops for our guests during the reception. I started that project during the summer and I only have a few more flip flops to tie together and label. I also need to create a framed sign to go along with the flip flops to let our guests know they are welcome to take a pair.

Once my projects are complete I'll be sure to post all about them.

Meanwhile, today is December 4th.....which means we have only 5 more months until the big day! Time flies!

Friday, December 2, 2011

Feather Hairpiece

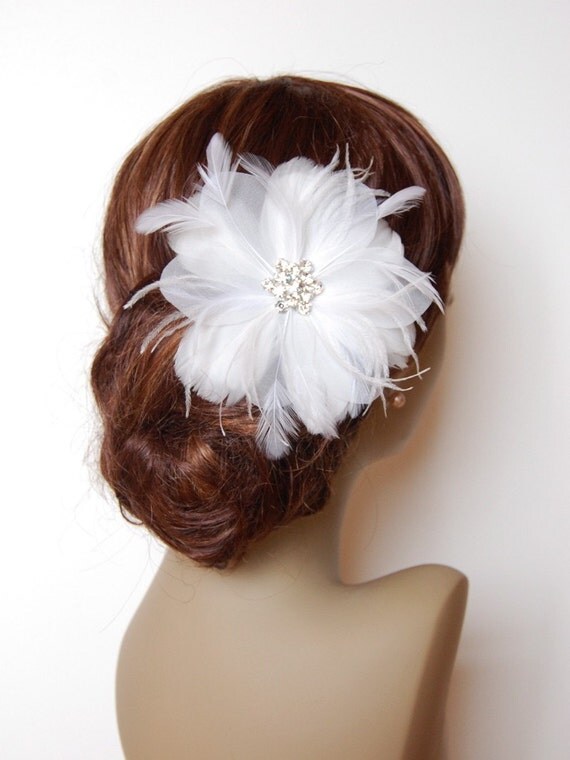
Earlier this week I decided it was time to get work on my feather headpiece. I pictured something with feathers and rhinestones; nothing too big or flashy. I was thinking of a smaller version of this feather headpiece I found here on etsy.com:


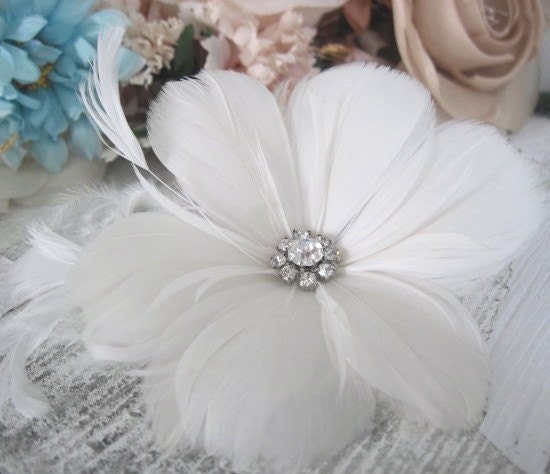
...or something like this headpiece found here :


So I gathered up my supplies and got to work.


I purchased a pack of white feathers from Wal-Mart for $1.48 (You can also find similar packs at Joann's Fabrics or Michael's Craft Store.)


I found these small crystals at Joann's Fabrics for just over $2.


This wire hair comb was also found at Joann's Fabrics for around $1.50.


The last thing I needed to work on this project was a little bit of white felt. I got one sheet of felt for just $0.25 at Wal-Mart.


The first step was to cut out a circle out of the felt. I used the bottle cap from a jug of juice to trace a circle on the felt.


Next I cut out the circle. This was used as the base of the hairpiece.


The bag of feathers I bought was green on the outside so I couldn't tell the size of the feathers until I opened the bag. The feathers ended up being longer than I needed, so I cut each one in half.


After the feathers were cut in half, I started glueing them to the circle of felt. I slightly overlapped each new feather over the last one I had glued down. Once a full circle had been made, I began cutting the feathers shorter and started another circle.


After all of the feathers were in place, I noticed that the hairpiece was a little too flat. To fix the problem, I used a needle and thread to sinch the felt circle together in the middle. This pinched together the piece and made it look a little more full.


The next step was the attach the wire hair comb. I used the needle and thread once more to sew the comb to the felt. After making sure the the comb was attached firmly, I glued a few more small feathers to the back of the hairpiece. This was just to make sure that the felt circle was covered and couldn't bee seen once the clip was put in place in my hair.


The last step was to attach the crystals to the center of the piece using a few drops of hot glue.


I LOVE the way the feather hairpiece came out. It was the perfect size; it made a statement without being too big. I was really happy with my finished project....

...unfortunately, I made a little crafty mistake. I got so eager to complete my project that I neglected to compare the color of the feathers to the color of my dress. The colors are a little off. It's not a huge difference, but it is noticeable. It's a little disappointing but it was such an inexpensive project that it's really no big deal. I'm going to check at Joann's to see if they carry feathers in a different shade. As for this feather hairpiece, it was a good practice project. Perhaps one of the girls in my Bridey group will like it and want to use it. If not perhaps one of my lovely readers will want to use it at their wedding. 

The Proposal Awards

Brides presents The Proposal Awards

Brides is hosting a contest for proposal stories and Zac and I have entered it.

We'd love it if you could vote for us :)

Zachary and Cristina Proposal Story
*Vote by clicking on the word LOVE underneath our story*

We appreciate your vote!