Showing posts with label project. Show all posts

Friday, December 2, 2011

Feather Hairpiece

Earlier this week I decided it was time to get work on my feather headpiece. I pictured something with feathers and rhinestones; nothing too big or flashy. I was thinking of a smaller version of this feather headpiece I found here on etsy.com:
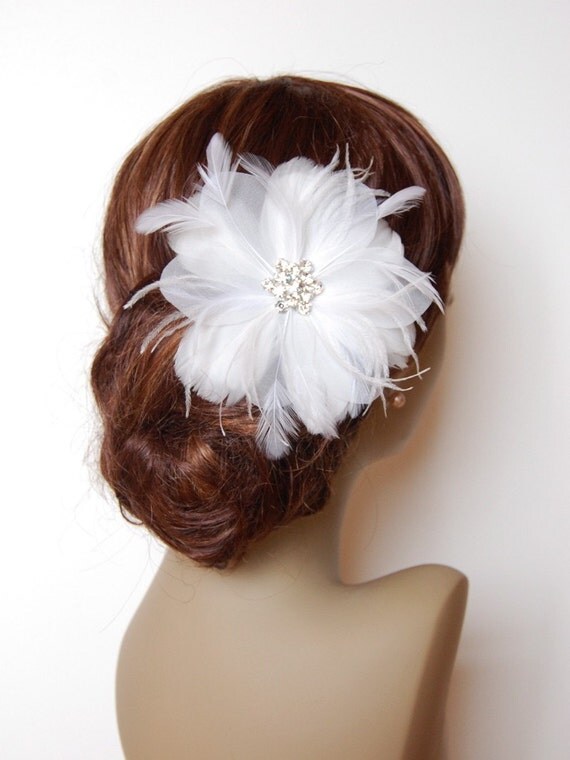

...or something like this headpiece found here :
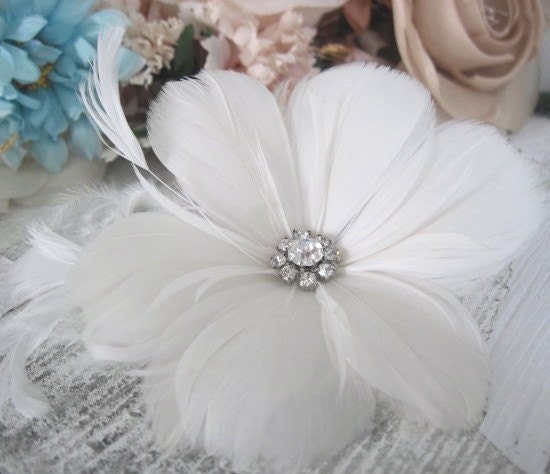

So I gathered up my supplies and got to work.


I purchased a pack of white feathers from Wal-Mart for $1.48 (You can also find similar packs at Joann's Fabrics or Michael's Craft Store.)


I found these small crystals at Joann's Fabrics for just over $2.


This wire hair comb was also found at Joann's Fabrics for around $1.50.


The last thing I needed to work on this project was a little bit of white felt. I got one sheet of felt for just $0.25 at Wal-Mart.


The first step was to cut out a circle out of the felt. I used the bottle cap from a jug of juice to trace a circle on the felt.


Next I cut out the circle. This was used as the base of the hairpiece.


The bag of feathers I bought was green on the outside so I couldn't tell the size of the feathers until I opened the bag. The feathers ended up being longer than I needed, so I cut each one in half.


After the feathers were cut in half, I started glueing them to the circle of felt. I slightly overlapped each new feather over the last one I had glued down. Once a full circle had been made, I began cutting the feathers shorter and started another circle.


After all of the feathers were in place, I noticed that the hairpiece was a little too flat. To fix the problem, I used a needle and thread to sinch the felt circle together in the middle. This pinched together the piece and made it look a little more full.


The next step was the attach the wire hair comb. I used the needle and thread once more to sew the comb to the felt. After making sure the the comb was attached firmly, I glued a few more small feathers to the back of the hairpiece. This was just to make sure that the felt circle was covered and couldn't bee seen once the clip was put in place in my hair.


The last step was to attach the crystals to the center of the piece using a few drops of hot glue.


I LOVE the way the feather hairpiece came out. It was the perfect size; it made a statement without being too big. I was really happy with my finished project....

...unfortunately, I made a little crafty mistake. I got so eager to complete my project that I neglected to compare the color of the feathers to the color of my dress. The colors are a little off. It's not a huge difference, but it is noticeable. It's a little disappointing but it was such an inexpensive project that it's really no big deal. I'm going to check at Joann's to see if they carry feathers in a different shade. As for this feather hairpiece, it was a good practice project. Perhaps one of the girls in my Bridey group will like it and want to use it. If not perhaps one of my lovely readers will want to use it at their wedding. 

Wednesday, November 2, 2011

Our Halloween

Hope everyone had a fun Halloween! Zac and I had a great time getting everything together for the event. Last year we didn't do much and as a result we didn't have that many trick or treaters. We decided this year we would carve more than just one pumpkin each and make our walkway look inviting.


Zac got started on hallowing the pumpkins and carving them.


Zac is much better at carving pumpkins that I am. Watching several pumpkin carving competitions inspired Zac to try carving faces into the pumpkins by only shaving off the rinds.


I think it turned out very cool. He also used a chunk of pumpkin to sculpt a nose for his creation. He attached it to the face with a toothpick.


My pumpkin was a little more cute and friendly. I drew out a template for an owl and carefully carved out each piece to create this little guy.


Unfortunately, we carved those two pumpkins a little too early and they fell victim to our still warm central valley temperature. We waited until Halloween day to carve the rest of the pumpkins. On these pumpkins, Zac decided to go more friendly than creepy and he created these funny faces.


The kids really seemed to like these little guys.


We covered the porch with fake spiderwebs, draped cheesecloth style fabric over the window and porch light, hung spiders, placed a pile of foam skulls and bones in the corner, and lined the path with our pumpkin creations and candles.


While the kids got a kick out of the funny face pumpkins, our pumpkin lanterns were a big hit with the grown ups. We used a drill to punch holes into these mini pumpkins and lined them along the our walkway. We loved the way they looked so we've decided that next year we'll make a bunch of them and use them to line the driveway as well.


With the decorating done and plenty of candy, we were ready for the trick or treaters.


This was our Jim's first Halloween. We usually dress him in little sweaters and shirts so he was a good sport about letting us put this little hot dog costume on him. Doesn't he look so adorable? He was a big hit with the trick or treaters. One little boy was so excited to see little Jim his mom literally had to drag him away to head to the next house.


After the first trick or treater came to the door Jim was hooked. He planted himself on the steps by the door and didn't move the whole rest of the night. Jim's never been one to bark when the doorbell rings so he didn't go crazy with each group of kids that stopped by. He was pretty excited however, and we could hear him begin to whine for us to open the door seconds before the doorbell ever rang. (*By the way, our walls are not vibrant yellow :P)


Even when we attempted to lure him away from his spot on the stair with a treat he wouldn't budge. Eventually, as it got later and the trick or treaters stopped, Jim fell asleep.


Jim enjoyed his first Halloween. How was everyone elses?

Monday, October 24, 2011

Stirring Things Up

It seems that I'm only adding to my project to do list these days. The newest one was inspired by this picture that I found on Pinterest via Hostess with the Mostess:


Aren't these owl drink stir sticks adorable? I couldn't resist tracking them down and found this video tutorial at  Hostess with the Mostess by Jesi Haack at Jesi Haack Weddings.


Seemed easy enough right?! That's what I thought. So I gathered my supplies and got to work on recreating these little owl stir sticks to add to drink glasses at the wedding. (I think I might also add them to toothpicks and use them to decorate the cupcakes at the dessert bar.)


I purchased a pack of 100 bamboo skewers at Wal-Mart for $0.99.


The paper punch was by Martha Stewart and I got it on sale for $9.99 at Michael's Craft Store.


The punch made some beautiful little owls on the paper I selected. I needed two for each stir stick.


The skewers were too long, but cut in half they were the perfect length to fit in drinking glasses.


A little dab of hot glue on one owl + the skewer + the second owl.....


...and voila! Adorable little owl stir sticks!


I chose four styles of paper with different prints and colors.  


They all seemed to go together quite nicely, and had a vintage feel without being so matchy matchy.


I'm really pleased with the way that these little guys turned out. Thank you again, Pinterest for inspiring yet another wonderful project!

Tuesday, October 11, 2011

Pin-spired Project

I have found a bunch of really cool pictures and projects on Pinterest, and I decided that it was time to get started on recreating a few. On Friday, Kim (one of my bridesmaids), came into town and Zac made dinner for the three of us. I thought that it would be a perfect time to test out the recipe I found on Pinterest for a Reisling Strawberry Slushie. (Click here for recipe found at With Style and Grace.)


Doesn't that look yummy? The recipe called for riesling but I decided to use a pinot grigio instead. Not knowing how it would turn out, I won't lie, I picked up a 2 Buck Chuck bottle of wine. (Though cheap it was still tasty.)


In addition to the wine the rest of the recipe called for strawberries, sugar, lime juice. You will also need two ice cube trays.

The first thing to do while prepping the drink is to reserve one cup of the wine and put it away in the fridge.


Next, wash and hull fresh strawberries....


...you will need 2 cups for this recipe.


You will also need 2 tablespoons of sugar (I used Splenda.)...


...and 1 tablespoon of lime juice.


Pour the remainder of wine in a blender or food processor (remember to reserve 1 cup and put away), then add the strawberries, sugar, and lime juice.


Blend mix until chunks of strawberries are gone.


Pour the mixture into 2 ice cube trays and place in the freezer until frozen solid.


After a few hours you will have some very pretty pink ice cubes. Now it's time for the remaining 1 cup of wine. Blend the ice cubes with the last of the wine. The mixture should have the texture of a smoothie.


Pour and serve! The mixture made enough to fill three wine glasses.


It was a yummy and refreshing treat. Thank you Pinterest!

Anyone tried out a recipe or worked on a project that was inpired by Pinterest? Have you found a project on Pinterest that you're excited to complete yourself? I'd love to hear all about it.

Tuesday, October 4, 2011

Candy Gram!

Reading the wedding forums on sites like weddingbee.com and theknot.com, I've noticed that there have been a lot of brides who regret their bridesmaid choices. I cringed reading stories of uninvolved bridesmaids, fights about clothing, and friendships ending.

I'm so thankful to have such amazing girls in my life! I knew that I wouldn't be one of those brides who would look back at photos from the wedding in 20 years and have regret or feel sad that the girls who stood by my side were no longer around. (Whether they like it or not my girls are stuck with me for life!)

I didn't realize however, that I would regret NOT having someone there.

I've been having some regret about not asking my girl Kim to be a part of the bridal party. I absolutely love Kim. We always have a fantastic time together and I know that I can count on her when I need an ear, a shoulder...or a glass of champagne. Talking the situation over with Samantha, and after running into Kim at Deja Blues, I knew that if I didn't ask Kim to join the bridal party that I would really regret it.

*Like I said....This is how I always great Miss Kimmie!*


Instead of just calling or sending her a text, I wanted to find a fun way to ask Kim to be a bridesmaid. It means a lot to me to have her by my side and a question like this was in the need for something special. (When I asked the other girls to be in the wedding I gave them all wine bottles.)

Kim moved for work and her job keeps her on the move so I wasn't sure when I was going to see her next. Since I was planning on mailing her a little gift,I decided that I would need a cute way of asking her that perhaps included a little poem or note. I revisited the ideas I had back in January and decided that the candy gram idea was the cutest way to ask Kim to be a bridesmaid.

I thought the candy gram idea was super clever. It involved incorporating candy names into a little note about bridesmaids. So I gathered together all the candy needed and began putting together Kim's package.


The candy used included: Dots, Mounds, Snickers, Smarties, Dove Promises Chocolates, LifeSavers, and Now and Laters. I also added some Good and Plenty.


After arranging the candy to fit into the box I printed out the note to include with the package. After all, Kim needed to know why I was sending her a box of candy. I printed out the note on cardstock and attached it to some pretty scrapbook paper.


The note reads as follows :

Bridesmaids are more than Dots in your life. They are Mounds of fun and make you Snicker. They are Smarties that share advice and keep their Promises. Above all, they are your Life Savers and will stand by you Now and Later.
 Would you be my bridesmaid?!
 I guarantee the fun times will be Good and Plenty!
I love you Miss Kimmie! I really should have asked you at the beginning and I have been kicking myself for not asking you sooner! I love you so much and I would be honored if you would stand by me on the big day!
Love you girl!
-Teeny
**I hope this candy sweetens the deal!**
I found a cute little round box at Michael's Craft Store that I used to hold the candy, and tied it up with some white ribbon. The package went out through overnight shipping. I went to sleep with a little excitement knowing that Kim would be getting the package the next afternoon.


I decided to text Kim the next afternoon to make sure that she was going to be home. Kim teaches a mobile classroom and she travels from city to city to teach. Thankfully she was going to be home that day to pack up a few things before heading to the coast. Had I waited a few more days Kim's package might have melted on her porch.

A few hours later I got a phone call from a very excited Kim! She said that she would love to be a bridesmaid and I am so happy that she'll join the other ladies by my side on the big day!

All of my ladies:


I love you girls!